Travel photography kit list – Giulio Groebert
One of the most frequently asked questions is “What camera equipment do you use when you travel?”
In this blog post, I will talk about the essential gear that I always carry with me on my trips around the world.
I will go through what I currently have in my camera bag, and I will also mention some equipment that I have used in the past.
Some of the links in this post are afflliate links. This means if you click on the link and purchase the item, I will receive a small affiliate commission. The price remains the same for you, but you are supporting my channel :-). Thank you very much
Software
A large part of my workflow consists of editing my images and videos.
I edit my photos using Lightroom, which can be used on a PC as well as on smartphones, tablets, etc. There is a free version and a subscription available. I have the subscription because it offers significantly more features that are essential for me. I’ve been using the program for years and wouldn’t want to be without it.
Additionally, I use my own presets that can be applied directly in Lightroom. There are other programs that might be a bit cheaper, but in my opinion, Lightroom is worth it 100%, and I don’t really know anyone who uses something else.
Occasionally, I also use Photoshop when I want to remove a person or something distracting from an image. Nowadays, you don’t even need to be a professional to achieve top results, thanks to AI assistance.
I edit my videos with Premiere Pro, and if you want, you can subscribe to Creatuve Cloud which includes Lightroom, Photoshop, Premiere Pro and a lot of other useful programs in a single package. Feel free to check out this link, where you can often find discounts that are worth it (for example here is a special discount for students).
Camera
Lets start with the most important part in my bag. There are a lot of camera brands and all of them make great gear, but i actually only used at the beginning of my photography journey Nikon and Canon and switched then to Sony.
I tried a lot of different Sony camera bodies in the past and also bought a bunch of them, thats why i only can and want recommend the one I made some experiences by my own.

My Cameras
Currently, I am using the Sony A1 as my primary camera and the Sony A7IV as my back up. During my recent trip to Middle America, I also had the opportunity to borrow the Sony A7rV, and I absolutely loved it.
All of Sony’s full-frame mirrorless cameras are incredibly lightweight and, in my opinion, offer the best value for the money. I also have the Sony A7c , which is super small and lightweight and shares many functions with the Sony A7iii, which I previously used.
The Sony A1 has 50.1 megapixels and incredibly fast autofocus and can shoot up to 30 frames per second, making it one of the best cameras for sports and wildlife photography. It can also shoot 4k in 120fps (with 10-bit). The only downside of the camera for me is the display which does not fold out vertically and that it is quite expensive.
The Sony A7iV boasts 33 megapixels and can shoot up to 4K at 60fps with 10-bit color depth. It’s a fantastic camera for both photography and videography, and I highly recommend it.
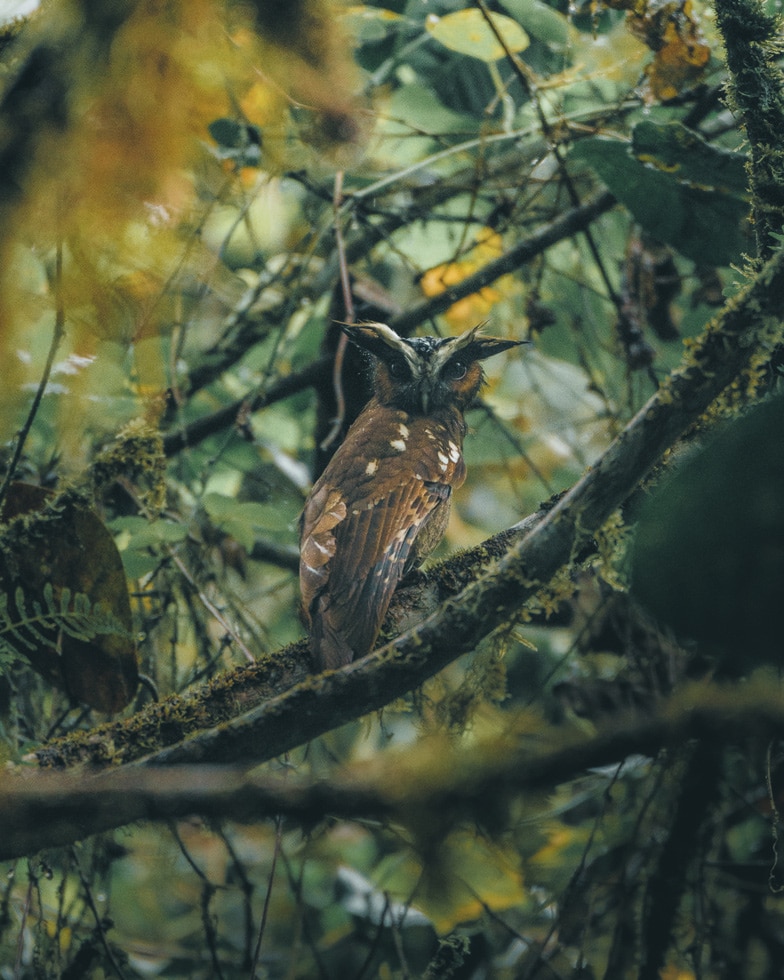
The A7rV is a step up in terms of quality, but it also comes with a higher price tag (compared to the A7IV). It offers an impressive 61 megapixels, which is fantastic if you’re planning to sell large prints. Another great feature is the ability to crop the photo after capturing it. This came in handy when I photographed birds in Costa Rica and didn’t have enough zoom to get a close-up shot. Additionally, the A7rV is the first Sony camera to have an automatic focus stacking function, which is perfect for capturing detailed shots in macro photography.
Best Sony Camera – for video
I’m not an expert in videography, but if you’re more interested in making videos rather than taking photos, I suggest looking into the SonyA7Siii or Sony FX3 cameras. They are excellent for shooting in low light conditions, and you can record videos in high quality up to 4k resolution at a smooth 120 frames per second.
Another great camera that is perfect for videos is the new Sony ZV-E1. It has an excellent built-in image stabilizer, so you can take incredible smooth shots with it. I just bought it in summer 2024.
Best Sony camera – for beginner
If you’re interested in getting into photography but don’t want to spend a fortune, I suggest looking into the Sony A6000 camera. It’s an APS-C camera, which means it has a slightly smaller sensor, and it’s been around for a while, but it still offers excellent image quality.
If you’re ready to jump into a full-frame camera right away, I recommend checking out the Sony A7ii or Sony A7C. These cameras have larger sensors, which can capture more detail and produce even higher quality images. Both options are worth considering depending on your budget and preferences.
Cameras i bought so far:
– I started with an old nikon from my dad
– 1. Camera: Canon 650d (APSC)
– 2. Canon 80d (APSC)
– 3. Switched to SonyA7ii (Full Frame)
– 4. Sony A7iii (Full Frame)
– 5. Sony A7c (Full Frame)
– 6. My Back Up Camera at the time Sony A7iV (Full Frame)
– 7. My main camera currently Sony A1
– 8. My main camera for video Sony ZV-E1
Lenses
Sometimes, the lenses you use with your camera are even more important than the camera itself. You could have the best camera in the world, but if you pair it with low-quality lenses, your pictures may not turn out as good as they could be.
Before purchasing a camera, it’s essential to consider the lenses you’ll need and their prices. Generally, full-frame lenses tend to be more expensive compared to APS-C lenses.
Instead of listing all the lenses I’ve used in the past, let me briefly explain the lenses I currently use for different purposes. I’ll also mention some cheaper alternatives available and the lenses I plan to buy.
My Lenses
– Sony FE 12-24mm F2.8 G Master
– Sony FE 70-200mm F2.8 GM OSS II
– Sony 100-400mm F4.5-5.6 GM OSS
– Sony FE 200-600mm F5.6-6.3 G OSS
Wide angle lenses
In landscape photography, wide-angle lenses are commonly used to capture expansive scenery. When I started, I used the Sony 16-35mm F4 lens, which I still use today. One of its great features is the ability to attach ND (neutral density) and polarizing filters. It’s relatively compact, and there’s also a newer version available that’s even more portable. If I were to buy it now, I would definitely go for the newest f2.8 version.
For wider shots, I often use the Sony 12-24mm F2.8 lens. It provides an incredibly wide perspective, perfect for low-light situations like astrophotography and capturing architectural details. However, it’s a bit pricey and comes with a downside: it’s relatively large and heavy, and it’s not easy to attach ND or polarizing filters due to its curved lens. There are options available, but they can be a bit cumbersome.
As an alternative, I highly recommend considering the Samyang 14mm F2.8 lens. I used it for a long time, and it offers excellent value for the price. It delivers impressive performance while being more affordable compared to other options.
If I could only pack one lens
The Sony 24-70mm F2.8 GM II lens is what I consider an “always-on” lens. It’s compact, lightweight, has a super fast autofocus, incredible sharp and offers a fantastic aperture and a versatile zoom range. In my opinion, it’s excellent for various types of travel photography, making it a lens I would recommend as a first choice for anyone starting out.
But to be honest, this lens is not really cheap, which is why I used the Tamron 28-75mm F2.8 until the end of 2023. It’s also a great lens and cheaper than the Sony.
Telephoto lens
These lenses are a bit of a love-hate relationship for me. I love them because they allow me to achieve a distinct look with their ability to compress images. They are perfect for photographing animals, capturing separated landscapes, and even for taking macros and portraits.
However, I hate them when I have to carry them in my backpack for long periods. They are relatively large and heavy compared to most other lenses, which can be quite cumbersome.
Currently, I own the Sony 70-200mm F2.8 GM II lens, which is incredibly versatile, especially when combined with a 1.4x or 2.0x telephoto converter. I also have the Sony 100-400mm F4.5-5.6 lens in my collection. In the past, I used to always carry the Sony 100-400mm lens, but now I find that the 70-200mm with the converter can effectively replace it and offer even better capabilities.
As I want to photograph more animals in the future I bought the Sony 200-600mm and the Sony 400mm f2.8, beginning of 2024.
Prime lenses
When I go on my travels, I don’t always bring prime lenses with me. I tend to reserve them for special occasions because, although they are usually sharper than zoom lenses and have a wider maximum aperture, it would be impractical to carry a bunch of primes alone.
However, prime lenses are perfect for low-light situations and when you want to achieve a beautiful background blur, also known as bokeh. If you plan to capture a lot of portraits, I highly recommend investing in at least one prime lens.
The good news is that you can find affordable prime lenses that still offer great quality. One of the most well-known options is the Sony 50mm F1.8 lens.
In my own collection, I have the Samyang 50mm F1.4 lens, but I rarely use it nowadays. Instead, I prefer to rely on the Sony 35mm f1.8 or the Sony 85mm F1.8 lenses because I personally prefer their image stile.
The Sony 35mm f1.8 lens is incredibly compact and lightweight, making it a frequent choice for me to pack. On the other hand, the Sony 85mm f1.8 lens is excellent for portraits when I want to focus on subject isolation.
In summer 2024 I tried the Sony 24mm F1.4 and i totally loved it. Thats why I bought it and its also a stunning lens for videos.
In the future, however, I would also like to buy a few more fixed focal lengths. And these would be on my wish list:
– Sony 35mm F1.4 GM (selling my 35mm F1.8)
– Sony 85mm F1.4 GM (selling my 85mm F1.8)
Macro lens
If you enjoy capturing intricate details and macro images, I highly recommend taking a closer look at the Sony 90mm f2.8 macro lens. It’s fantastic for close-up shots and delivers exceptional sharpness. Also a lot of photographer use it for product photography in combination with focus stacking.
Smartphone
Smartphones are becoming increasingly advanced. They are small, lightweight devices that can capture high-quality photos and videos. They are great for sharing on social media platforms. Personally, I find it convenient and quick to record most of my videos using my smartphone because it has excellent stabilization. If you want to enhance the stability even further, you can use a small smartphone gimbal like the Insta360 Flow.
When purchasing a smartphone, I recommend looking for one that has three different camera: a wide-angle, a normal, and a telephoto lens. This gives you a lot of flexibility and allows you to capture various types of shots. Additionally, having the ability to take pictures in RAW format is beneficial if you don’t want to invest in a traditional camera. It provides more options for editing your images later on.
As someone who primarily records videos with the phone, an important feature for me is that it can shoot in 4K resolution and at least 60 frames per second on all three cameras. This enables you to slow down the footage in post-production and achieve superior results.
Over the years, I have owned many smartphones. Currently, me and Elena use the Sony Xperia 1V and the iPhone 14 Pro Max.
Drones
Drones offer a whole new perspective when it comes to photography, and I absolutely love using them. Over the years, I’ve tried out numerous drones, and I’d like to share my favorite ones with you.
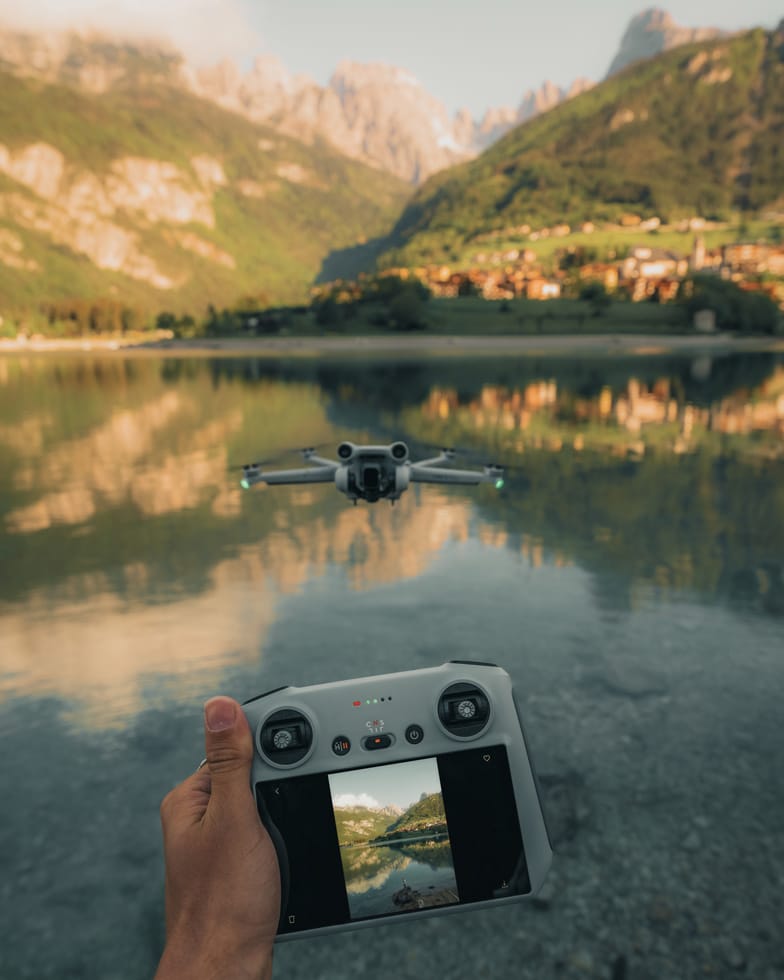
Currently, my go-to drone is the DJI Mini 3 Pro. It’s incredibly small and lightweight, making it easy to carry around. One of its standout features is the ability to rotate the camera, allowing me to capture both landscape and portrait photos and videos. Additionally, it can record videos in stunning 4k resolution at 60 frames per second. I just upgraded to DJI Mini 4 Pro, and can totally recommend it.
For low-light conditions or when the weather is a bit rougher, I turn to the DJI Mavic 3. It’s larger in size and handles strong winds exceptionally well. While it offers excellent image quality, it’s downside is that you can only capture photos and videos in landscape orientation with this drone.
Using drones has allowed me to explore new perspectives and capture unique aerial shots that would otherwise be impossible. Whether it’s the compact and versatile DJI Mini 3 Pro or the powerful Mavic 3, each drone has its own strengths depending on the shooting conditions and desired image quality.
If you’re seeking a drone that offers better stability than the Mavic Mini 3 Pro while still allowing you to rotate the camera gimbal, the DJI Mavic 1 Pro could be a suitable choice. However, it’s important to note that this drone is heavier compared to the Mini 3 Pro.
And if you want the best from the best then check the DJI Mavic 3 Pro which has 3 cameras build in.
I also use filters with my drones and I now prefer to use ND filters that also have an integrated polarizing filter. This is super useful for removing reflections, e.g. on water (lake or sea), but you can also see this clearly when it has rained, e.g. on leaves on trees.
I use this Filters on my DJI Mini 4 Pro. And this Filter Pack on my DJI Mini 3 Pro.
Insta 360 x3
I recently acquired the Insta 360 X3, which is a camera that captures 360-degree footage. It’s fantastic for capturing unique and unusual perspectives. One of the coolest features is the ability to shoot yourself using an “invisible” selfie stick. The camera’s software does some clever calculations, resulting in some mind-blowing shots.
I particularly enjoy using the camera with a 3-meter pole. It allows me to simulate drone footage in locations where flying an actual drone isn’t possible. It’s a great workaround that gives me the thrill of drone-like shots even when I can’t take to the skies.
Gimbal
I own both a gimbal for my camera and one for my smartphone. However, I find myself rarely using the gimbal for my camera because it’s quite large and heavy, making it inconvenient to bring along when I travel. On the other hand, I always have the Insta 360 Flow gimbal with me, specifically designed for smartphones. It’s incredibly compact, packed with impressive AI features, and ensures that my smartphone shots are incredibly smooth.
If you’re in need of a gimbal for your mirrorless camera and weight isn’t a concern for you, I can still recommend the DJI RS 3 Pro gimbal. It offers excellent stabilization and performance. Additionally, there’s now a more compact version available, the DJI RS3 MINI, although I haven’t had the chance to try it out yet.
Tripod
When it comes to choosing a travel tripod, my top priority is finding one that is both lightweight and stable. In the past, I’ve tried a lot of options, but I don’t really recommend them. Currently, I’m using a tripod that is of higher quality. I’ve discovered that (more or less) same model is also available from Ulanzi at half the price. I had purchased this version before and wanted to use it with the Falcam Quick Release System. However, I couldnt securely attach the plate to my camera, so I couldn’t use it and would had to pay the return shipping of 50$ to China by my own.
As a result, I ended up investing in the more expensive original tripod from Peak Design, and I couldn’t be happier with it. The quality and performance of the Peak Design tripod have exceeded my expectations, making it worth the higher price tag.
Camera backpack
I’ve spent a long time searching for the right camera backpack and I’ve tried a lot options. Right now, I’m using the Tilopa and Sukha from F-Stop Gear. What’s great about this backpack is that you can buy compatible Internal Camera Units (ICUs), which essentially turn the backpack into a dedicated camera backpack. I have multiple ICUs, so I can adjust the amount of camera gear I carry depending on my needs. The best part is that these ICUs can also be packed into any other backpack, so it’s really convenient. When I go on longer hikes, I simply pack the ICU into my trekking backpack.
I also have this camera insert from Tatonka, which is a bit cheaper and also perfect to combine with any backpack you already have.
And if you are looking for a cheap camera backpack, i can recommend this one from Tarion. I used it a long time and also some of my friends bought it and liked it as well.
My favorite camera accessoires
Sometimes, small things can make a big difference, and that’s exactly the case with these camera accessories that I love.
Peak Design Capture Clip
One of my absolute favorite accessories is the Peak Design Capture Clip. It may be a bit expensive, like most Peak Design products, but the quality is fantastic. This clip allows you to securely attach your camera to things like a backpack, making it easily accessible. Even if you have a large lens like the Sony 100-400, the clip holds up really well. It’s a great tool to have for conveniently carrying your camera around.
Peak Design Camera Strap
Another really handy accessory from Peak Design is their camera straps. What makes them super practical is that they can be easily attached or detached using a clever system. I personally use both the hand strap and a shoulder strap, depending on my preference and the shooting situation. These straps make it convenient to carry and handle the camera while providing a secure and comfortable grip.
Camera L- Bracket
One of the accessories I get asked about most often is the orange part around my camera. It’s an L-bracket, which allows the camera to be mounted on the tripod in portrait and landscape format. I use one that is adjustable in size and I can use it with all my Sony cameras. It is also compatible with my Peak Design tripod –> its called the Ellie PD Short. But the L-Bracket is also available in many other versions for very different cameras so i would recommend to check their shop if you have another camera or tripod.
Camera Lens Filters
When it comes to filters for my camera, I prefer using Freewell filters. They have a special magnetic system that makes attaching and switching them incredibly easy. I have magnetic step up rings for all of my lenses, and the filters themselves are in the 82mm size. The filter I use the most is the CPL filter, which I keep on my camera most of the time. Sometimes, I also like to use variable ND filters or regular ND filters of different strengths for certain shooting situations. Overall, the magnetic system and quality of Freewell filters make them my go-to choice for enhancing my photography.
They also have new system which i havent used so far, but you can combine there ND / CPL and Gradient Filter. I have to say it looks really great and i probably will give it a tray in the future.
Memory Cards
SD cards are essential for storing your photos and videos, and it’s always good to have extras. The type of SD card you need depends on the camera you have because different cameras have different requirements for capturing the best footage.
As for my camera, I primarily use SDXC V90 cards like the one from SanDisk or Lexar. It meets the necessary requirements and provides reliable storage for my camera’s files.
When it comes to my drone and Insta360 X3, I use SDXC V30 cards like this one from Sadisk or Lexar. Drones and action cameras also have specific requirements, so it’s important to choose an SD card that is compatible and meets the necessary specifications.
Remember, having enough SD cards ensures you never run out of storage space and allows you to capture your best moments without any worries.
Tip: I highly recommend carrying some extra micro SD cards with you and changing or backing them up regularly, especially when flying a drone. This is important because if your drone crashes, you don’t want to lose all the valuable recordings you have captured. By using multiple micro SD cards and swapping them out or making backups, you can ensure that even if something unfortunate happens to your drone, you won’t lose all your precious footage. It’s always better to be safe and prepared when it comes to preserving your recordings.
Spare Batteries
One important thing you should have is extra batteries for both your camera and your drone. If you’re considering buying a DJI drone, I highly recommend getting the “fly more” package because it comes with 3 batteries. In my experience, having at least that many batteries is crucial.
For my camera, I have 6 Sony batteries, but generally, having 3 should be more than sufficient.
To make things even more convenient, I suggest purchasing a dual charger that can charge 2 camera batteries at the same time. This way, you can charge multiple batteries simultaneously and be ready for your next adventure without any delays.
Hard Drives
Having reliable storage options is crucial for me, and I always make sure to have a few hard drives on hand. During my trips, I carry at least two Lacie hard drives, each with a capacity of 5TB. These hard drives are where I save all my pictures/videos, ensuring that I don’t lose any precious memories.
In the past, I also used SSD hard drives to work on projects on my laptop or save my Lightroom catalog on them. However, my current MacBook has 4TB of internal storage, which is usually sufficient for storing my pictures and videos.
At my home office, I have a Network Attached Storage (NAS) system with four 16TB hard drives. This serves as my backup solution, allowing me to securely store copies of my data.
One important thing I’ve learned from experience is the significance of mirroring my pictures and videos. Simply saving them on one storage medium can be risky because hard drives can fail. I’ve encountered situations where drives broke down, and losing files is one of the worst things that can happen. Therefore, it’s essential to have multiple copies of your data on different storage devices to ensure its safety and prevent any devastating loss.
Portable Light
During my travels, I typically rely on natural sunlight as my primary light source. However, I’ve found that carrying a small portable light can be incredibly useful in certain situations. For example, when I find myself in a dark forest and want to capture detailed or close-up shots, having a portable light comes in handy. It allows me to illuminate the subject and capture those special moments.
Additionally, a small video light can be a lifesaver during emergencies while hiking or camping.
Camera Cleaning
When I’m traveling, I frequently change lenses on my camera, and they often get wet or dirty. To keep them clean and in good condition, I always carry some camera lens wipes with me. These wipes are designed specifically for cleaning camera lenses and help remove smudges, dust, or fingerprints.
In addition to lens wipes, I also have sensor cleaner with me in case there’s a spot on my camera’s sensor. It’s important to keep the sensor clean to ensure that my photos come out clear and without any unwanted marks.
When I travel to places with high humidity, I often encounter a problem where my camera equipment gets fogged up and doesn’t dry properly. To prevent this, I make sure to pack silica gel packets. These little packets are great at absorbing moisture. I distribute them in my camera backpack and also place a packet with my laptop, hard drives, and drone.
By having silica gel packets in my gear bags, they help to minimize the humidity and moisture that can cause fogging and damage to my equipment. These packets are handy and help keep everything dry and in good condition.
Clear Accessory Pouches
To keep things organized and easily accessible, I use different pockets to store items such as hard drives, memory cards, and other small electronics like chargers. This helps me maintain order in my suitcase or backpack, and I always know exactly where these things are.
Hard Drive Case
SD Cards Case
Electronics Organizer
Laptop
Currently, I’m using a 16-inch M1 MacBook Pro Max with 4TB of storage. Although it’s not the most compact or lightweight option, the larger screen is incredibly helpful for editing while I’m traveling. The spacious display allows me to see more details and work more comfortably on my projects.
Moreover, when I’m at home, the laptop is perfect for connecting to an external monitor. This setup provides an even larger workspace, which is great for multitasking or working on projects that require more screen real estate. The MacBook Pro Max has ample power to handle all the tasks and software I need, ensuring smooth performance and efficiency.
To protect my MacBook Pro Max while I’m on the go, I use a sturdy cover. This cover adds an extra layer of protection, safeguarding it from scratches and minor bumps during my travels.